Sunday, July 6, 2014

Barbie Clothes

My latest endeavor has been to cloth all of my daughter's naked Barbies.  They have clothes, but the clothes Mattel makes border on scandalous (short short skirts and short short dresses, not to mention totally unrealistic profession outfits).  I wanted Barbie to have pants and they hardly ever sell Barbie pants, and I wanted t-shirts and longer skirts and dresses that went at least to the knees.  Thus began my attempts at finding patterns to make Barbie clothes.  I found one at Joannes and got it on sale at a fair price, but was disappointed to find that the pants pattern was not wide enough for Barbie's big hips, even though it was a modern pattern and the pattern claimed it was for Barbie.  So I modified that and went on my way, though I haven't tried any of their shirt patterns yet.  For the shirts I ended up following a tutorial on YouTube.  I don't have a tutorial for you in this post, but check back later and I will get a tutorial up on making the shirts and pants.

I wasn't initially going to make career outfits, but I got tired of wasting good fabric on botched attempts at using the Joanne's pants pattern so I cut up an old teal shirt (and that attempt went right), so from there I made a shirt and Barbie had an ER doctor's outfit.  My daughter loved it.


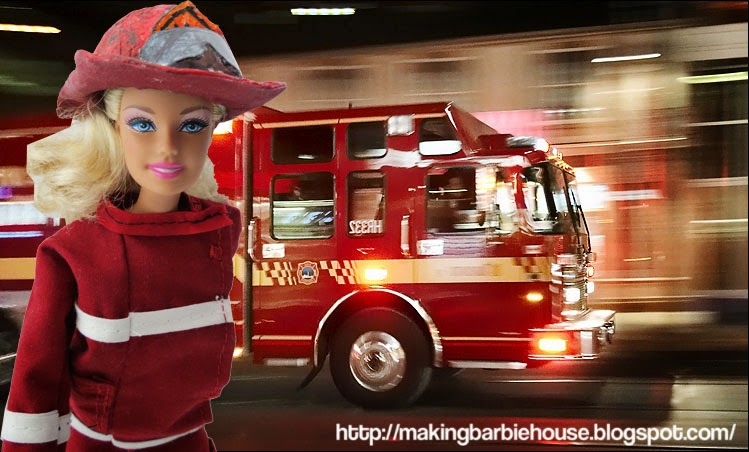
The next day I tackled a Barbie firefighter outfit.  I ended up making a hat for her too.  I will get a tutorial on hats up at some point so be on the look out.


The Fourth of July was just a day away and I had a scrap of flag fabric so out came 4th of July Barbie.  With her patriotic shirt and firework pants we decided that she was going to be Captain America's daughter.  My daughter loves the super hero dolls as much as she does Barbies.


And finally, it's summer and her Barbies had no casual summer shirts so I made this cute little shirt out of a scrap of fabric.  We dubbed her 'stay at home mom' Barbie because of the wild hair.  All of my fellow stay at home mom friends got a laugh out of it.


This is all I have for now.  My daughter is requesting I turn a Ken doll into a police officer and do another fire fighter uniform for a Ken doll so that firefighter Barbie can have a partner to go to work with.  I also plan on making aviator Barbie and Engineer Barbie.  Keep on the look out for clothing tutorials here in the future.

Tuesday, December 3, 2013

Finished Barbie House

Got the house put together and the wallpaper up in time for her birthday in October though it took me until now to get the pictures up.  Here they are.  For wallpaper I used scrapbooking paper and tape.  I picked up the scrapbook paper on sale at Michael's and Joanne's (mostly at Michaels) for about 20 cents a sheet.

Here's the construction of the house.  We got the shelving unit for $25 at Big Lots.  It's a single unit and those two pieces are meant to go on top of each other.  That presented a problem because we wanted it to be 2 pieces, so we took an old blond shelf we had laying around and drilled holes and screwed it to the bottom of the half without a bottom shelf.  Worked great and gave that taller shelf real stability.  If you go the shelving unit route, make sure it's tall enough for Barbie's to sand up in with some clearance.  I didn't have a tape measure with me in the store, but they also sold Barbies so I ran over and grabbed one from the Barbie isle and measured it against the display shelf they had set up.  It was a good fit and gave Barbie some clearance overhead too inside each shelf room.

Here's Barbie's outer downstairs deck and yard, though she uses the deck to park her Barbie Jeep most of the time.
 

Barbie also has an upstairs deck as seen in the full picture of the completed house.  Unfortunately you can also see our messy craft room.

Here's the downstairs of the taller portion which has the kitchen and living room.

Kitchen with our hand made fridge (tutorial still comming on that one):


And the sparse living room. No couch as of yet.

Second level of the taller portion.  Adult bedroom with our homemade furniture and bedding.


Third story of the taller portion.  Girl's room.  I call it the 'cherry' room because of the colors and how bright and fun it is.  Most of the furniture in here is home made.


Downstairs of the smaller portion which is a laundry room/misc whatever she makes it room.


Upstairs of the smaller portion which is the bathroom and boy's room with home made furniture.  I really love how that bed turned out.


Maybe I'm crazy but I love this paper.

And finally, here it is in her room on her birthday with other toys already trying to crowd it out.  It was well worth making this for her though, she plays with it almost every day, though recently her 12 inch spiderman doll has taken up residence there and she's turned the rest of her Barbies into 'the Avenger's who now live there also. That's ok, it's versatile  :)  As for storage, that footstool looking thing on the left has a lid that lifts off and holds the rest of her misc Barbies, their clothes and other bedding and accessories so we keep the Barbie house pretty clean, and when she plays with the house, she sits on the stool.


Friday, August 30, 2013

Tutorial: How To Make A Barbie Daybed, Bench, Kid Bed With Drawers

How To Make A Barbie Daybed
How To Make A Barbie Kid Bed
How To Make A Barbie Bench
(With Drawers That Open)

This one is one of my crowning achievements in our attempt to build Barbie furniture for the dollhouse we're building for our daughter's fifth birthday.  This one piece of furniture serves as three and is also functional as Barbie storage for all those little Barbie accessories or clothes.  Plus it's just pretty to look at.  The best part?  The total cost was $2 for the wood plus 2 cans of spray paint.  Everything else I already had.


So here's the tutorial: 

I know the tutorial was brief, but I like it that way.  Let me know if you had any questions about it in a comment below and I'll do my best to get back to you in a comment.  For a more detailed description about how to make the mattress top, blankets and pillow, see our Queen Size Bed Tutorial.

Barbie Bean Bag Chair

Tutorial: How To Make A Barbie Bean Bag Chair

I wanted to share with you how I made a bean bag chair for the kid size barbies.  I plan on making another one in girl colors for my daughter's doll house.  This is the one I made:


It takes 5 small pieces of fabric so I chose 2 green and 3 brown and filled it with rice and it came out great!  Plus I love the smell of rice.  I used a funnel to put the rice in.  I used the tutorial below to make this by MyFroggyStuff.  It took me about five minutes from start to finish, but if you're hand sewing it will take a bit longer.


Update on using rice: If you use rice, be absolutely SURE you sew up all the seams.  My 5 year old found the tiniest of holes in the bean bag chair, stuck her finger inside to see what was in there, and proceeded to work the hole bigger and bigger until there was rice from one end of the house to the other... I was picking up grains of rice for days.  Instead I would suggest dry beans (though this is a choking hazard for small children so don't use if your kids might put it in their mouths), and be sure to sew it up good and tight!  Double check!!

Have you made a Barbie or doll bean bag chair with this tutorial?  We'd love to see it!  Share a link of your picture in a comment below!

Tutorial: Making a Queen Size Bed For Barbie

Tutorial: How To Make A Queen Size Bed For Barbie On The Cheap


Supplies:
- Paint
- Fabric
- Old socks, an old towel, or pillow fluff
- Scissors
- Hot glue gun and hot glue sticks
- 2x4 wood
- 1x6 wood
- Hand saw
- 3 Nails (about 2.5 inches long)
- Hammer
- Your doll to measure


Wood Prep:
1) Measure your Barbie or other fashion doll from head to foot.  Add 2 inches.  For this Barbie Bed I made it 14 inches long.
2) Get a 1x6 (true measure is 1 x 5.5) and cut to the length of your doll plus two inches.  Note, if you're using a larger doll, you will want to get a wider piece of wood, perhaps a 1x8.  For Barbie 1x6 is just wide enough to get two dolls into the bed.  You can use a fine toothed hand saw if that's what you have.
3) Cut a 2x4 (true measure is 2x 3.5) to the height of your doll.  In this case I cut the 2x4 to 12 inches.
4) Paint the 2x4 whatever color you want the base of the bed to be.  It's not really visible, but it's nice to paint it.  I used semi gloss white that we had left over from painting a room in our house.  Let it dry and take care of the rest of the bed and bedding while it's drying.

Making the Mattress Platform:
5) Hot glue 2-4 old socks (or use an old towel or pillow fluff) to the top of your cut 1x6.  Make sure they are secure.
6) Place your mattress platform sock side down on top of a piece of fabric that will be your sheet.  Cut and wrap the fabric around the platform, covering all visible wood, and hot gluing as you go.  You want to glue all the rough edges to the under side of the platform (the side without the socks or pillow fluff).

Making the Bedding/ Barbie Blanket and Pillows:

7) Set your finished platform on the table.  Take a piece of fabric and lay it on top of the platform about 2 inches from the top.  Cut a rectangle that measures 3 inches on either side of the platform and from the bottom.  This is to allow the blanket to hang over the edges, and also to allow for seam allowance.  Do the same on another piece of fabric (the backing of the blanket).  Make sure the two pieces of fabric are the same size.
8) I like to make my Barbie blankets reversible so my daughter can get a new look just by flipping them over, so I pick different colors of fabric for the front and back of the blankets and pillows.  In the picture below you can see I chose brown and green.
9) Put your fabric good sides together and sew around all four edges, making sure to leave at least a 2-3 inch gap unsewn so you can flip the blanket right side out.  Be sure to backstitch when you start and stop.  When you're finished, turn the blanket right side out, turn the unsewn edges in, and sew up the gap.  You can hand sew this if you want to, but it goes faster with a sewing machine.
10) With the blanket right side out and the gap sewn up, sew a line all the way around the blanket to give it a finished look.  You can sew 1 or 2 lines across the middle if you wish to better hold the blanket in place.
11)  Take a small piece of fabric (I usually use leftover from the bedding) and put it at the head of the mattress platform.  Measure an inch wider than the platform by two inches.  Put the fabric right sides together and sew around all four edges, leaving a gap to turn it right side out.  Use the eraser end of a pencil to help you turn it if you can't get your fingers into the gap.  Fill it with a cut up old sock, pillow fluff, or sewing scraps.  Sew the unsewn gap closed.

Finishing The Bed
12) (See bottom picture for help).  Put your mattress platform sock side down on a workbench or the ground.  Put your dried painted 2x4 on top and center it.  Take 3 nails and hammer through the 2x4 into the back side of the mattress platform.  Note:  Nails need to be long enough to go through the 2x4 and into the 1x6, but not so long that they will go all the way through the 1x6 and stick out into the bedding where little hands can get hurt when playing with the bed.  The nails I used only stuck about a quarter inch into the mattress platform.  Expect the 2x4 to get a little dented from the hammer.  Make sure the nails go in all the way and the nail heads are flush with the 2x4.
13) Put your blanket and pillows on the bed, and enjoy! 


If you've made a doll bed from this tutorial, we'd love to see pictures!  Post a link to them in a comment below!